Removing a tick from your dog might not be the most pleasant part of pet ownership, but it’s one of those tasks that can save your pup from serious health risks. Ticks aren’t just annoying: they can carry diseases like Lyme disease or Rocky Mountain spotted fever, which can make your dog sick and lead to expensive vet bills. Knowing how to safely and effectively remove a tick is a skill every dog owner should have, especially if you live in an area where ticks are common.
I still remember the first time I had to remove a tick from my own dog. I was nervous, but once I learned the right technique, it became a quick and stress-free process. The key is to stay calm and act carefully: your dog will pick up on your energy, so if you’re relaxed, they’ll be too.
Key Things to Understand
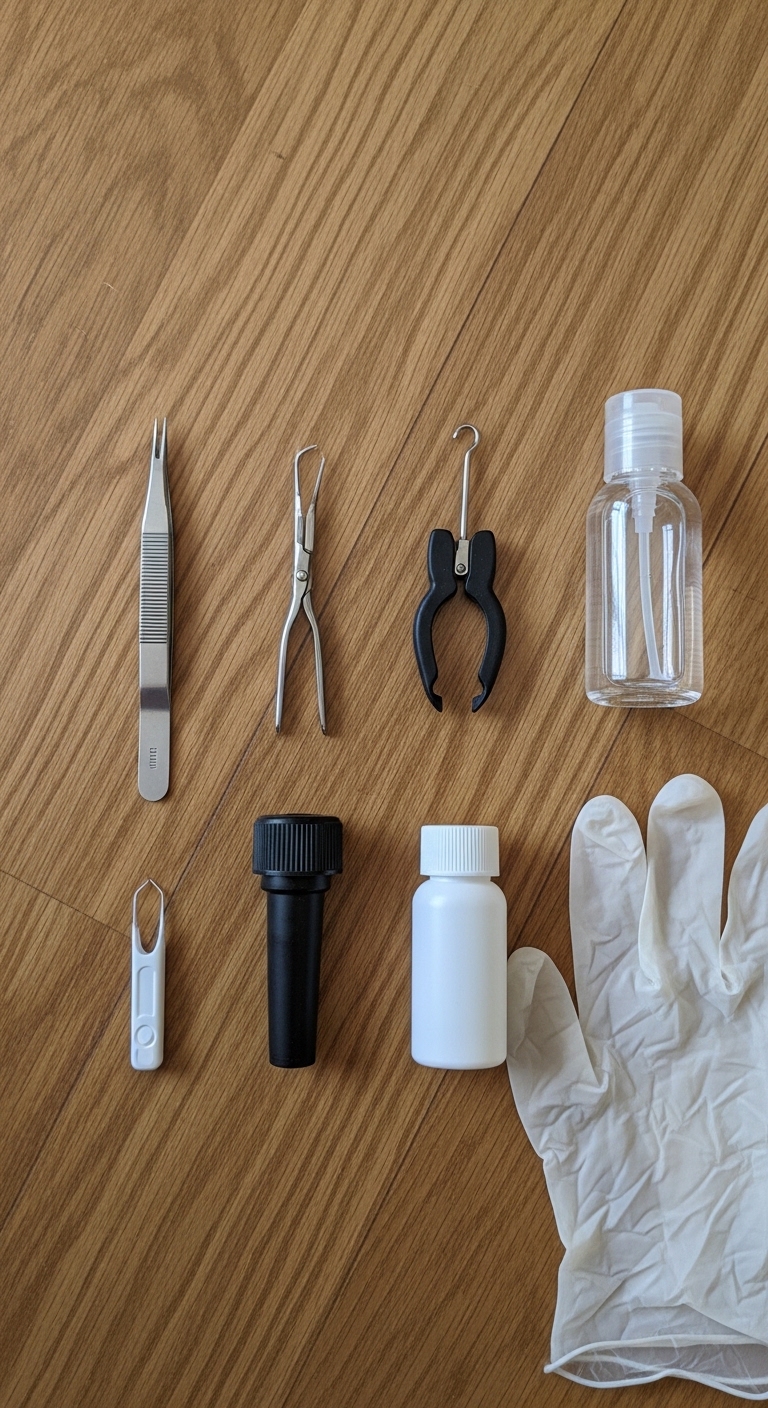
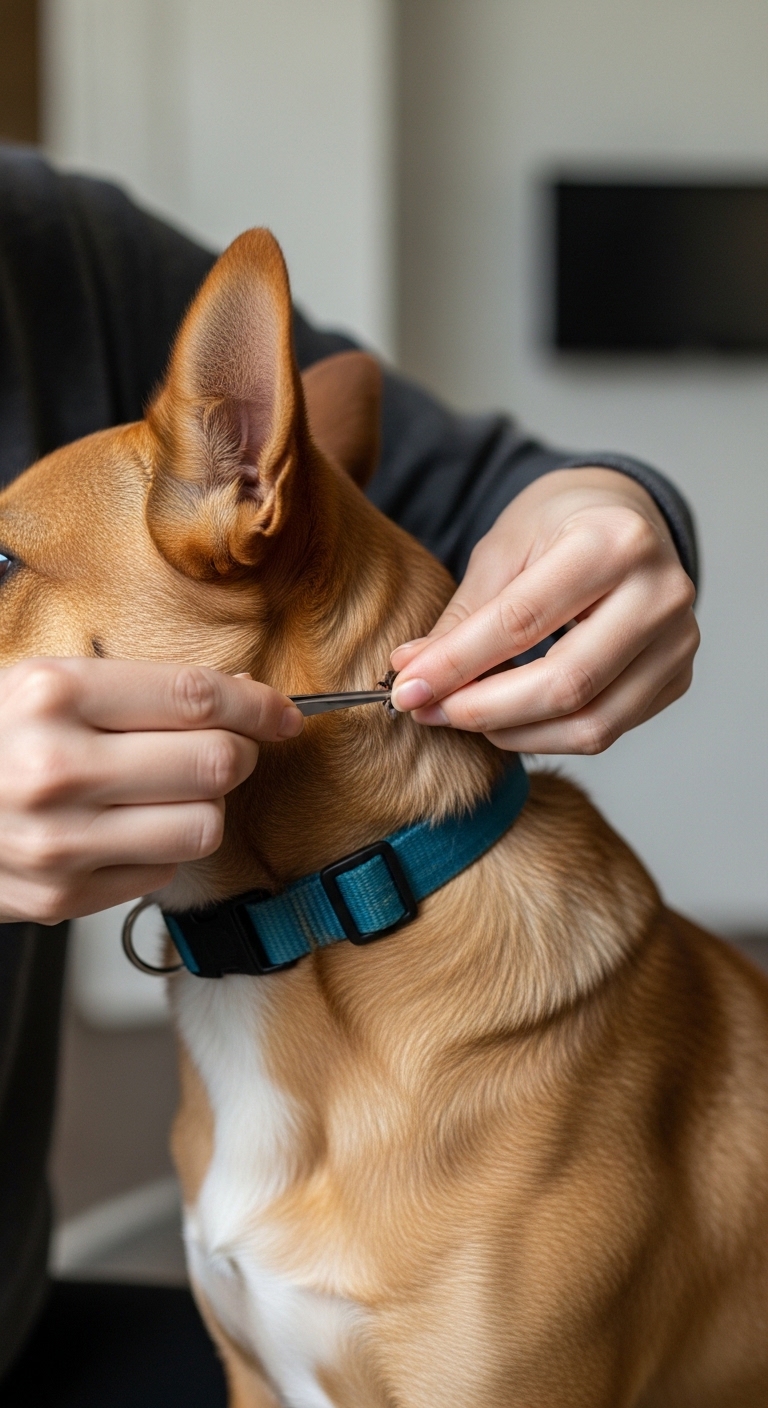
- Use the right tools: Always use fine-tipped tweezers or a tick removal tool designed for pets
- Avoid squeezing: Never squeeze the tick’s body while removing it, as this can push infected fluids into your dog’s bloodstream
- Check thoroughly: Check the bite area after removal to make sure no parts of the tick are left behind
- Monitor your dog: Keep a close eye on your dog for a few days after removal in case of signs of illness like lethargy or loss of appetite
- Save the tick: Save the tick in a sealed container in case your vet needs to identify it later
What to Look For
When inspecting your dog after outdoor time, focus on areas where ticks commonly hide. These include the ears, between the toes, under the collar, around the tail, and in skin folds. Ticks can be as small as a pinhead or as large as a grape once they’ve fed, so run your hands gently over your dog’s coat to feel for any unusual bumps. If you find something that doesn’t look right, part the fur to get a better look: ticks often look like small, dark, oval-shaped bugs attached to the skin. Pay attention to your dog’s behavior too. If they’re scratching a specific spot more than usual or seem restless, it could be a sign they’ve picked up a hitchhiker. Some dogs don’t show any immediate reaction to ticks, so a thorough check is always worth the effort. If you’re unsure whether what you’ve found is a tick, compare it to images online or ask your vet for help identifying it.
I once made the mistake of using tweezers that weren’t fine-tipped, and it made the removal process much harder. Since then, I always keep a dedicated tick removal tool in my first aid kit. It’s a small investment that makes a big difference in how smoothly the process goes. Also, don’t forget to mark the date on your calendar when you remove the tick: this helps you track any changes in your dog’s health in the days that follow.
Safety and Comfort
The most important thing is to keep your dog calm during the process. If they’re wiggling or stressed, have someone gently hold them or wrap them in a towel to limit movement. Work in a well-lit area so you can see clearly, and have treats ready to reward your dog afterward. This turns a potentially scary experience into a positive one, making future checks easier.
Cleaning and Hygiene
After removing the tick, clean the bite area with mild soap and water or an antiseptic wipe. Monitor it for the next few days for signs of redness, swelling, or infection. If the area looks worse or your dog seems uncomfortable, contact your vet. It’s also a good idea to wash the tweezers or tool with hot water and rubbing alcohol to kill any bacteria before storing it away.
Common Mistakes to Avoid
Don’t use your bare fingers to remove a tick: this increases the risk of squeezing the body or transferring germs. Avoid twisting or jerking the tick, as this can cause the mouthparts to break off and stay embedded in the skin. Don’t assume the tick is dead if it falls off on its own: always check your dog thoroughly to ensure it’s fully removed.
Even after removing a tick, stay vigilant. Some tick-borne diseases take weeks to show symptoms, so keep an eye on your dog’s energy levels, appetite, and behavior. If anything seems off, don’t hesitate to call your vet: it’s always better to be safe than sorry.
Frequently Asked Questions
- → What tools do I need to remove a tick from my dog?
Use fine-tipped tweezers or a tick removal tool designed for pets. Avoid using your fingers, petroleum jelly, or matches, as these methods can harm your dog or fail to remove the tick properly.
- → Is it dangerous if the tick’s head stays in my dog’s skin?
While not always harmful, a retained head can cause irritation or infection. Monitor the area for redness, swelling, or pus. If the head doesn’t come out or symptoms persist, visit your vet.
- → Should I use rubbing alcohol on the tick after removal?
No. Submerging the tick in alcohol won’t kill it quickly enough to prevent disease transmission. Instead, flush it down the toilet or seal it in tape for disposal.
- → How can I tell if my dog has a tick-borne illness?
Watch for symptoms like fever, lethargy, loss of appetite, lameness, or swollen joints within weeks of removal. Early diagnosis improves treatment outcomes, so contact your vet if you notice these signs.
- → Can I prevent ticks on my dog in the future?
Use vet-approved tick prevention products like spot-on treatments, oral medications, or collars. Regularly check your dog’s coat after walks, especially in grassy or wooded areas, and keep your yard trimmed to reduce tick habitats.
- → What should I do if my dog’s tick bite becomes infected?
Clean the area with mild soap and water, apply a pet-safe antiseptic, and keep an eye on it. If the wound swells, oozes pus, or your dog shows pain, seek veterinary care for antibiotics or further treatment.